
Aluminum Components for Lighting Products
Lighting
Lighting components combine thermal contact, long profile geometry, mounting details and visible appearance. JUNCHU coordinates aluminum lamp bodies, heat-sink components, end caps and brackets from your design. The profile, diffuser interface and finish are planned together so the mechanical parts support the intended lighting assembly.
Lamp Bodies
End Caps · Brackets
TYPICAL COMPONENTS
Extruded Aluminum
Machined Interfaces
MATERIAL OPTIONS
Thermal Contact
Color · Texture
DESIGN PRIORITIES
Diffuser Fit
Mounting · Cut Length
DRAWING INPUTS
Plan the Lighting Component Set
Bring the housing section, light-source layout, diffuser and installation arrangement into one mechanical drawing package.
Review the Section
Define the profile cross-section, diffuser channel, wall balance and required cut lengths.
Add the Features
Plan cable openings, threaded ends, mounting holes and heat-source contact surfaces.
Approve Appearance
Use a suitable sample to align visible color, texture and the treatment of cut ends.
Protect Long Parts
Pack profiles, covers and end caps to prevent rubbing, bending and damage to cosmetic faces.
Application Requirements
Components for Lighting
Lighting components need compatible profile sections, diffuser retention, end caps and mounting details. Review the source mounting face and thermal interface alongside the visible surfaces. Long profiles also need clear cut-length, straightness and protection requirements so finished parts can be assembled with consistent alignment.
Review the profile cross-section, diffuser interface and cut length. Plan secondary machining for connectors, mounting holes and end features.
Lighting Design Priorities
Connect profile geometry, heat and appearance
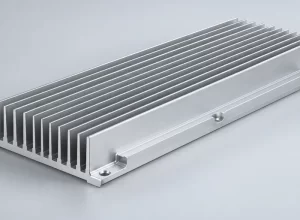
Thermal Contact
Specify the mounting face and interface to the light source. Cooling depends on the complete lamp design and operating conditions.

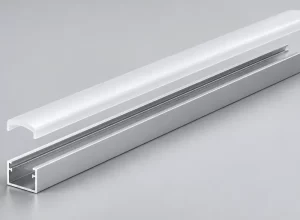
Diffuser Retention
Review the actual diffuser section, insertion method and clearance along the profile length.
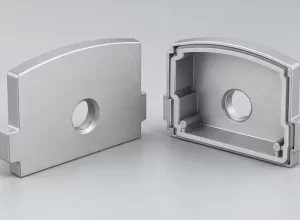
Cable & End Details
Coordinate connector space, cable exits, end-cap fastening and service access before secondary machining.
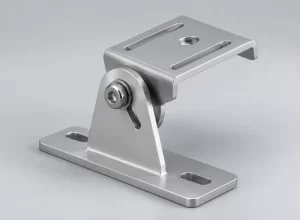
Visible Surfaces
Define viewing faces, gloss, texture and acceptable variation across adjacent profiles and end caps.
Application-Specific Design & Inspection
Review the details visible in the finished lamp
A good lighting component needs consistent interfaces as well as an acceptable surface. Resolve the mechanical and cosmetic priorities before batch production.
01
Profile Straightness
Long bodies must suit the mounting arrangement and diffuser fit. Identify straightness and twist requirements that affect assembly.
02
Mounting Arrangements
Check bracket adjustment, tool access and attachment details against the intended installation.
03
End-Cap Alignment
Locate fasteners and mating edges from the housing references so gaps and alignment can be checked meaningfully.
04
Finish Consistency
Use the base alloy, surface preparation and sample reference to define the appearance of connected parts.
05
Product Validation
Specify any sealing, temperature or other product tests separately; component supply alone does not establish a lamp rating.
06
Packing by Length
Define separation, end protection and labeling for long profiles and matched component sets.
Ready To Start Your Project?
Discuss Your Lighting Components
Send the housing section, cut lengths, diffuser and end-cap details, light-source mounting interface and installation arrangement. Mark visible faces, finish references, cable exits and any untreated contact areas. State the required fit checks and identify product-level temperature or sealing validation separately.
Discuss confidentiality and NDA requirements before sharing sensitive project files.